
Marshmallows
Home made marshmallows are fluffy clouds of melt-in-your-mouth sweetness.
The texture and taste is far superior to the manufactured variety.
Easy to make, easy to store, and a great gift idea.
Servings
many
Ready In:
30 min prep
Calories:
sugar, just sugar!
Good For:
sweets and gifts
Inroduction
About this Recipe
By: Sharyn
Ok one little point I should raise before I wax on about how easy these are to make. They are only easy if you have a stand mixer and a confectionery thermometer – you don’t want to be making marshmallows without those bad boys.
Ingredients
- 1 1/2 cups (360 ml) cold water
- 40 gm (about 1/4 cup or 6 x 1/4-ounce packets) unflavored powdered gelatin
- 500 grams (2 1/2 cups) granulated sugar
- 240 ml (1 cup) light corn syrup (or glucose – half a jar)
- 2 teaspoons pure vanilla extract
- 1/2 vanilla bean, split lengthwise and scraped (or 1 more teaspoon vanilla extract)
- Nonstick cooking spray (tasteless)
Sweet topping mixture:
- 1/2 cup (60 gm) pure icing sugar (confectioners’ sugar)
- 1/4 cup (30 gm) cornstarch
Taste it and adjust so that the mixture is sweet but not corny.
To give the exterior a chance to dry out (and form that fluffy sugary skin) prepare the marshmallows the day before you would like to serve. Home made marshmallows, if stored properly, should retain quality for up to two weeks.
Store in a sealed, airtight container.
Step by Step Instructions
Do the prep jobs first:
- When making confectionary always ensure that your equipment is sparkling clean and grease free.
Step 1
Pour ¾ cup/180 milliliters cold water into the bowl of a stand mixer. Sprinkle the gelatin on top, and set aside until the gelatin has absorbed the liquid and expanded, 5 to 8 minutes, stirring after 3 minutes.
Step 2
Meanwhile, add the granulated sugar, corn syrup and the remaining ¾ cup/180 milliliters water to a medium saucepan; bring to a boil over medium-high heat. Clip a candy thermometer to the pan or have an instant-read thermometer at hand. Boil until the syrup reaches 240 degrees, 5 to 6 minutes, then remove the pan from the heat. Tip – if sugar crystals on side of pan put lid on to steam them back down – take lid off when sugar starts to boil – don’t stir sugar once it starts to boil)
Step 3
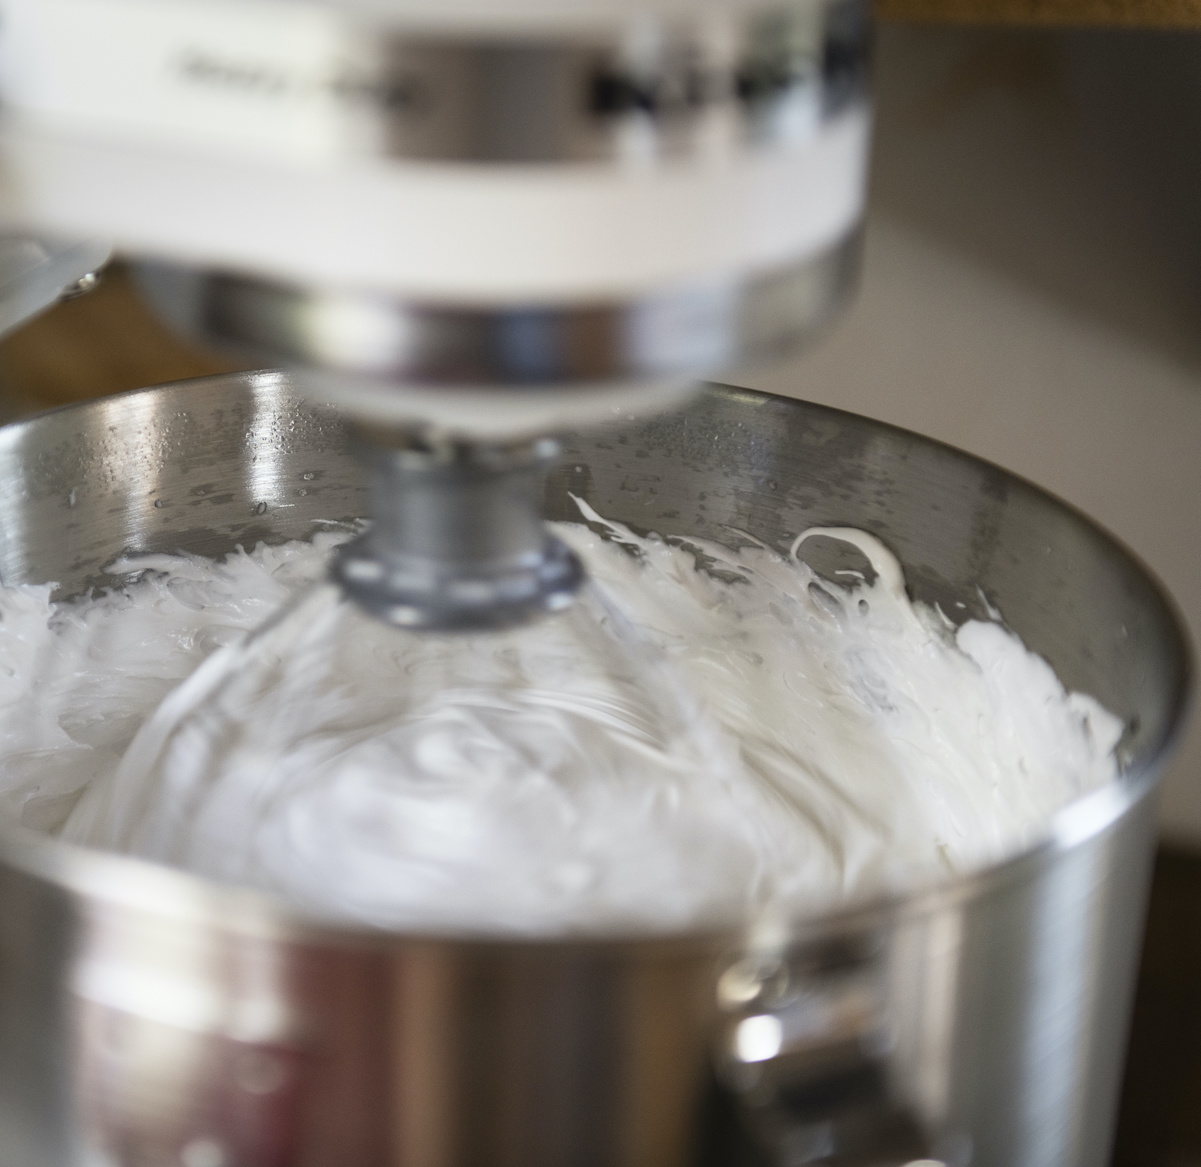
Fit the mixer with the whisk attachment, turn to low and slowly add the syrup, pouring it down the sides of the bowl – you do this so that the sugar slightly cools before it hits the gelatin (you can’t add boiling liquids to gelatin). Add the extract and the vanilla-bean seeds (or extra extract). When the syrup and flavourings are fully incorporated, gradually increase the mixer speed to high, and whip until the mixture is thick and cooled to room temperature, about 12 minutes.
Step 4
While the marshmallow mixture is whipping, coat a 9-by-13-inch baking pan with nonstick spray. Combine the cornstarch and confectioners’ sugar in a medium bowl, then generously dust the inside of the pan with some of the cornstarch mixture. (It’s important that the bottom of the pan be very well covered.)
Step 5
Coat a plastic bowl scraper and your hand with nonstick spray. Scrape the marshmallow mixture into the pan. Use the flat side of the scraper to get the mixture into the corners of the pan and to even out the surface. Sift some of the cornstarch mixture over the top. Cover the pan with plastic wrap, and let rest for at least 4 hours before cutting.
Step 6
Cut the marshmallows: Dust a chef’s knife with some of the cornstarch mixture; dust a piece of parchment paper, too. Run the knife around the edges of the pan to loosen the marshmallow mixture, then turn it out onto the parchment. Cut the slab into small squares. Dust all sides of the marshmallows with the cornstarch mixture by dropping a few marshmallows at a time into the bowl, tossing them around and then tossing each one from hand to hand to shake off the excess. Store in an airtight container for up to 2 weeks.